There have been many requests asking us to show how to create a sticky footer in WordPress. In this post, I will show you how you can add a sticky footer to your WordPress site.
A sticky footer is nothing but the bottom section of your site’s post or page attached to the bottom of the screen at all times.
The idea of a sticky footer is that it “sticks” to the bottom of the browser’s window.
Here is an example.
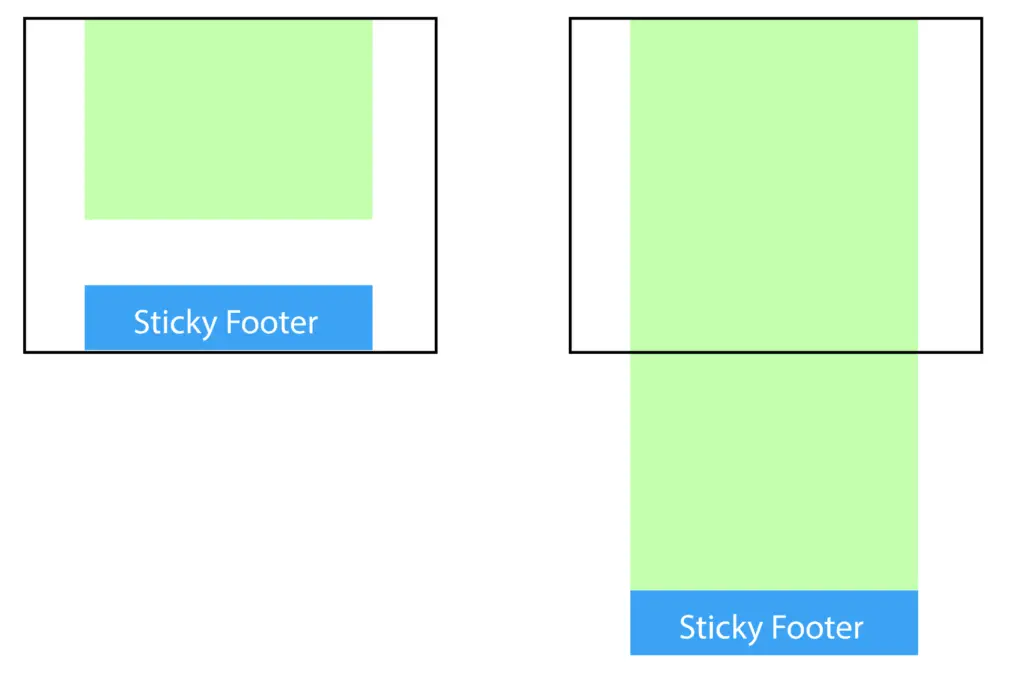
A sticky floating footer bar allows you to display your valuable content to users prominently. This bar remains visible to users at all times as they scroll, so they are more inclined to click on it and discover whatever you have to offer.
You can use a sticky floating footer bar to promote anyone or more of the following:
- Promote your featured posts
- Capture emails to build your list
- Announce events
- Draw attention to special discount offers
- Anything relevant to your users
Now there are many methods of creating a sticky floating footer bar in WordPress, I will discuss the best and easy to follow options here below.
Method 1 – Using WPFront Notification Bar Plugin
- Login to your WordPress admin dashboard. Click on Add new plugin and search for WPFront Notification Bar.
- Install and activate the plugin.
- Go to Settings >> Notification Bar. This will open the WPFront Notification Bar Settings.
- Modify the settings as per your needs.
- Click on Save Changes.
The following settings are available.
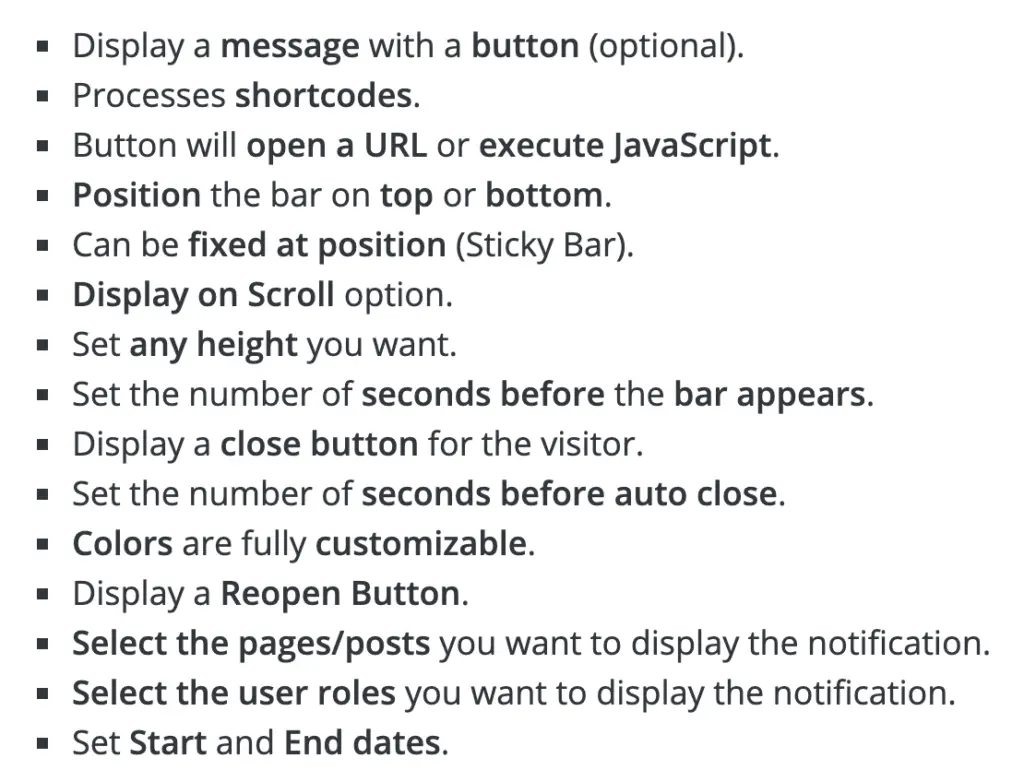
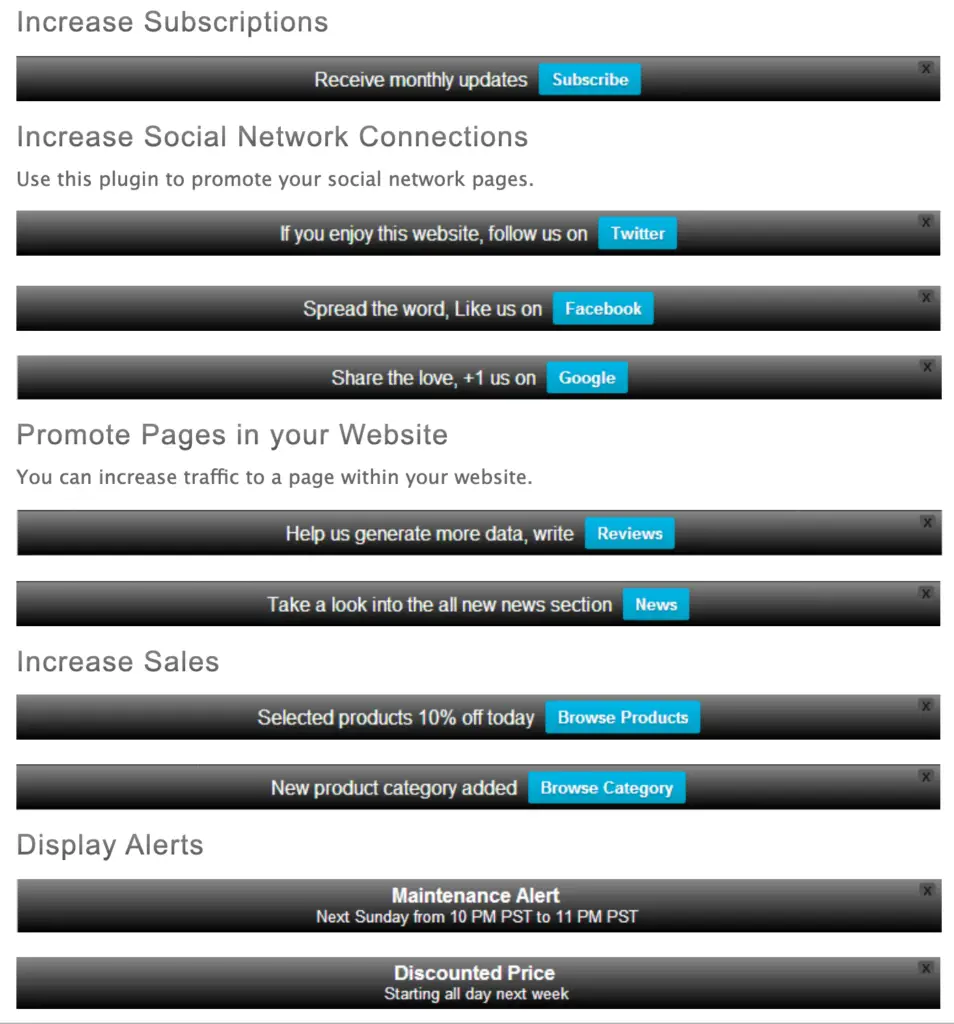
Here are some ideas of what you can create using this plugin.
Below is a screenshot of the plugin in use.
Method 2 – Using OptinMonster
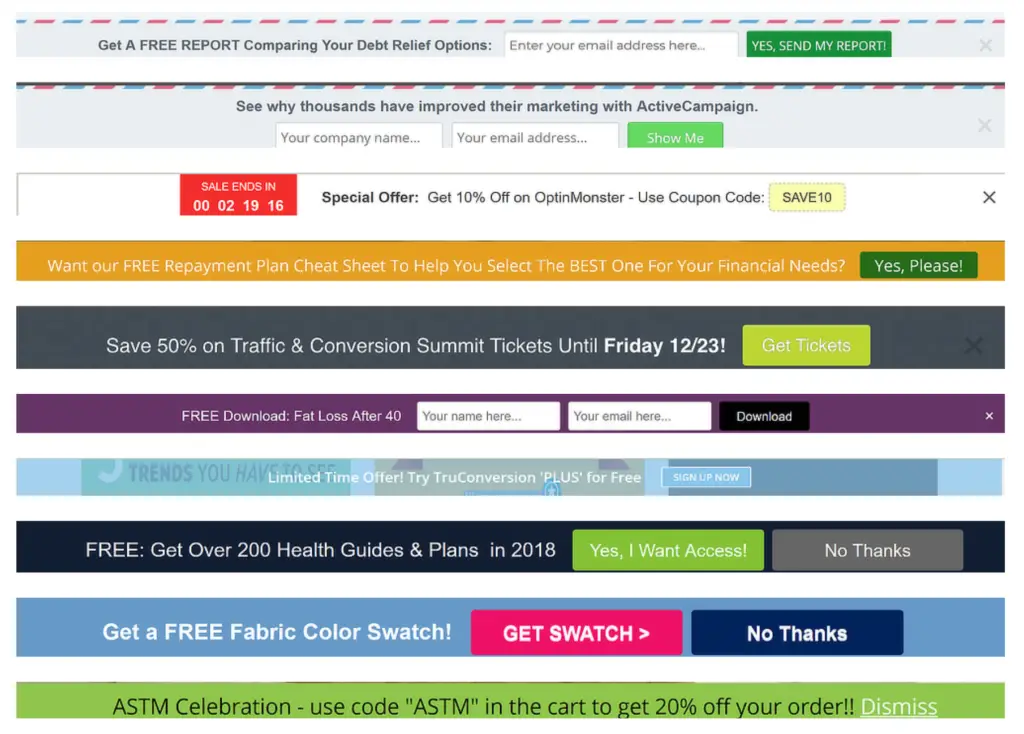
You can quickly create attractive footer bars using OptinMonster’s Floating Bar campaigns.
Here are some floating bar examples being used to increase engagement and drive clicks to call-to-actions.
The only flip side to using this method is that OptinMonster is a paid service.
Once you have purchased OptinMonster (Plus, Pro, or Growth plan), you can go ahead and install the OptinMonster WordPress API plugin on your website.
This plugin acts as a link connector between OptinMonster and your WordPress site.
After the plugin is activated, you will see a new menu item named OptinMonster. Click on it to go to the plugin’s Settings page.
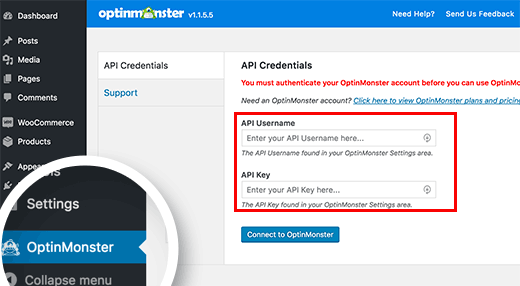
Enter your OptinMonster API username and key. Your API username and key are available in your OptinMonster account.
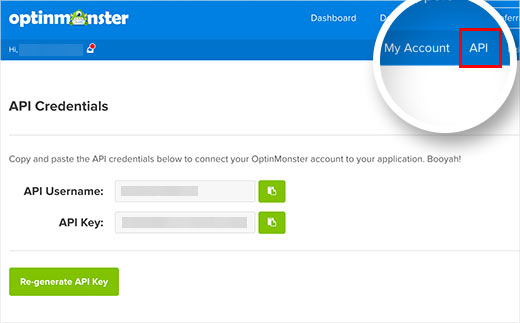
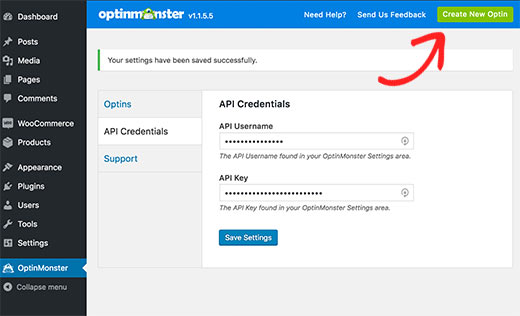
Copy-paste the API username and key into the plugin settings and click on the Connect to OptinMonster button.
Once this is done, your OptinMonster account and WordPress site will be connected.
Next, click on the Create New Optin button to get started with creating the sticky footer bar.
Enter the title and choose the website wherein you want to create the floating sticky footer bar.
If you cannot find your website in the list, then click on ‘Add a new website’ link.
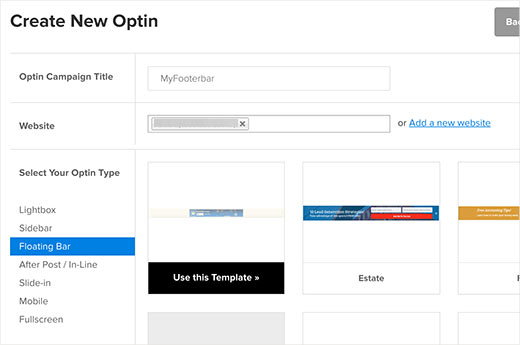
Click on the Floating bar option under the Select your optin type menu.
Once you have selected it, OptinMonster will launch its design editor. Here you can make changes to the appearance of your sticky footer bar.
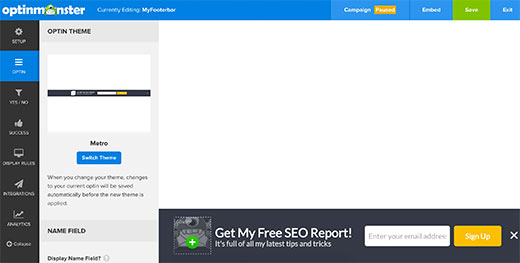
After you are satisfied with the appearance of your optin, click on Save.
OptinMonsters call these optins, but they need not be. You can use the Yes / No functionality to add a button to the floating footer bar.
Once you have created the floating bar, it will remain paused by default, which means that it won’t be live on your website. Hover over the status bar located in the top menu and choose Start Campaign.
The floating bar you have designed is ready to be live on your WordPress site.
Go back to the admin area of your WordPress site and click on OptinMonster » Optins. You should see the optin you have just created listed there. If you are unable to see it, click on the Refresh Optins button and the plugin will display it.
Now, click on the ‘Edit output settings’ link to continue.
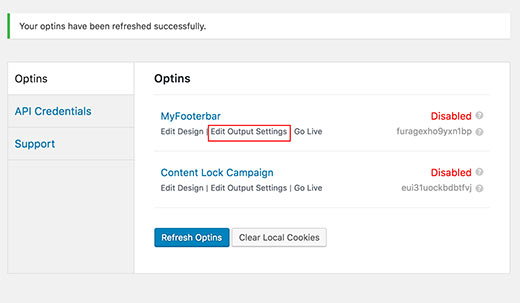
Check the box next to ‘Enable optin on site’ option and then click on the save settings button.
There are advanced options available that allow you to only show the floating bar on specific posts, pages, categories, etc.
Finally, the floating footer bar would be live on your WordPress site.

Method 3 – Manually using Code
This method involves adding code to WordPress files, hence it not recommended for beginners. It is also quite complicated. Hence it is beyond the scope of this article and not mentioned here.
You are better off hiring a WordPress developer to get it done for your website.
I hope this article helped you add a sticky footer bar to your WordPress site.
Feel free to comment below in case you face any issues while following this guide.
Thank you for your guidance
Your article was very good, and you have given very good information in this article.
Thank You For Sharing,